Depending on the instructor's preferences, speaking tests administered in Zoom may be preferable to F2F testing for a number of reasons:
- The test is completely private, with no students sitting nearby within earshot of other students taking the test.
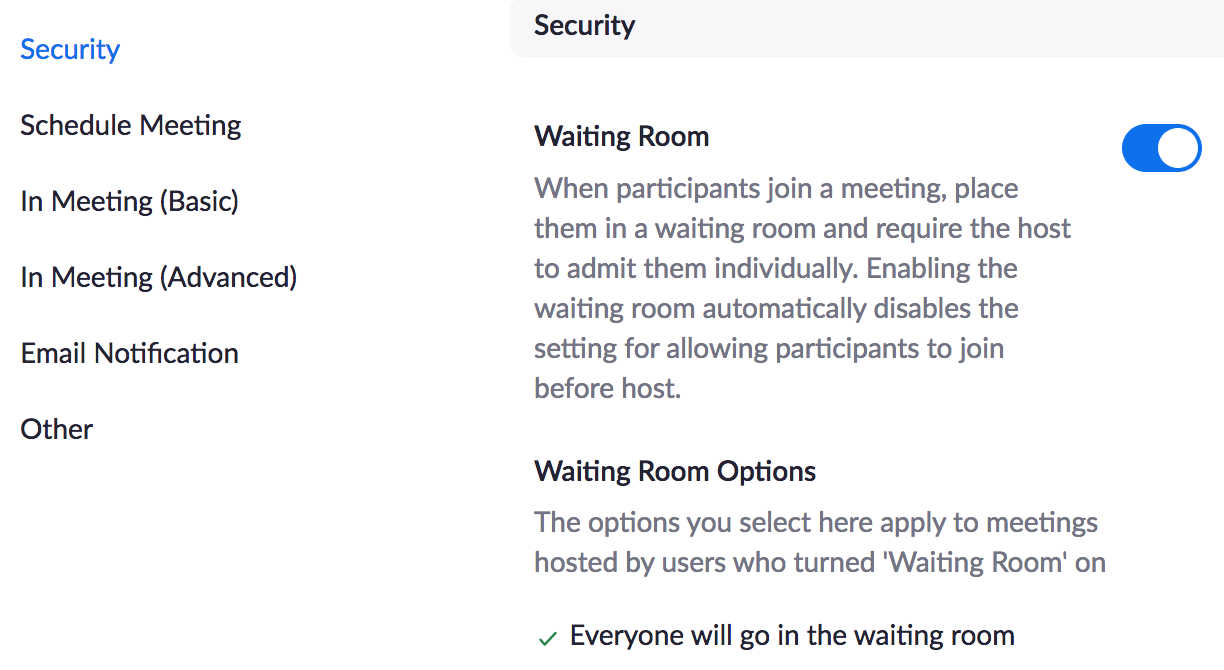
- The “Waiting Room” function (enabled in the Zoom Settings) assures that no one will accidentally “walk in” before the instructor is ready for them.
- The tests can easily be recorded for later review and/or confirmation of results — or for playing back a segment with the student in order to analysze their performance.
- Taking notes during the test can be done more discreetly and therefore produce less anxiety than in a F2F setting.
A few technical pointers:
To activate the “Waiting Room” function:
- Click on “Sign in / Configure your account” on the home page of the browser interface (princeton.zoom.us).
- On the left-hand navigation column, choose “Settings.”
- The very first item that appears (under “Security”) is the Waiting Room. Click to turn it “on”, and be sure that the option directly below it is set to “Everyone will go in the waiting room”:

Once this is done, a student who clicks on the meeting ID will see a window informing them they are in a “Waiting Room” rather than in the actual meeting, and that the host (i.e., the instructor) will let them in when ready.
(NB: Instructors who want students to join the class meeting early so they can chat casually must disable the Waiting Room feature in the Settings prior to class meetings, and then re-engage it for speaking tests.)

Dual Speaking Tests
Zoom can also be used for dual speaking tests, i.e., tests involving pairs of students whose interactions form part of the assessment. Jamie Rankin (GER) made use of this format in GER 102, where students being tested engaged in interviews and “information-gap” tasks.
To set up these tasks:
- Prepare two Word documents, each containing the information (or interview questions) for one student in the pair, labeled “A” and “B”.
- Open an email window for each student to be tested during the testing session, with their email address typed into the address space.
- Arrange these emails on your desktop, grouped together for each pair of students.
- Attach the “A” document to one email, and the “B” document to the other (this can all be done in advance, as long as the configuration in each student pair is certain).
- After any other preliminary tasks during the test, click on “Send” in the two emails, and ask the students in the test to confirm that the attachments have arrived and can be read.
- Allow the students just enough time to read through the information in the attachments, and then have the students begin talking, using the prompts they've just read.
- During the ensuing conversation, the instructor can remain an observer rather than a participant – unless there is a breakdown of communication that calls for an intervention.
(As complicated as this may sound, it takes very little effort or time during the test itself, and it ensures spontaneous responses from the students.)
