“Oral feedback (with the instructor’s voice, tone, and even video image) can feel more personalized to students and can improve their sense of connection to the instructor and the group, something especially important for remote students.”
Girons & Swinehart, p. 40
Synchronous feedback for an individual student takes place in a private Zoom meeting with the student. (Tip: Use a randomly generated meeting code, rather than your personal Zoom ID or a recurring class meeting ID, in order to ensure privacy and eliminate the possibility of Zoombombing.)
Whole-group feedback — or asynchronous comments for a particular student — can be given by way of a pre-recorded video. There are numerous ways of creating this, e.g., the YouTube video editor and Flipgrid, but if you’re accustomed to using Zoom, this is a handy way to record a video of yourself. Simply host a meeting with you as the sole participant, record it, and then retrieve the resulting .mp4 video file to post on Canvas.
If you’ve not familiar with making a video recording of a Zoom meeting, here are the basic steps:
- Point your browser to https://princeton.zoom.us to open the web portal (rather than the mobile app) and click on the Sign-In button.
- On the left-hand navigation column, click on Settings, then click on “Recording” at the top of the page.
- Check the functions you want. Be sure to include “Record active speaker …” / “Record gallery view …” — and be sure NOT to include “Record an audio only file”
Tip: Look at the camera while you speak rather than at your face on the screen. Looking at yourself (or anyone else on the screen, for that matter) draws your eyes away from the camera and creates the impression that you’re not speaking directly to them.
Once you’ve made the settings, host a meeting and follow these procedures:
- Click on Record at the bottom of the screen in the control bar.
- A blinking red light in the upper left-hand corner of your screen indicates that the recording is in progress.
- When you’re finished, click on the square (“Stop”) button to the right of the blinking light to stop the recording, click End and End Meeting for All.
- Retrieve the recording — either from the cloud server (you’ll have to wait for an email informing you that the file is ready) or on your computer, depending on how you’ve chosen to store the video file in Settings.
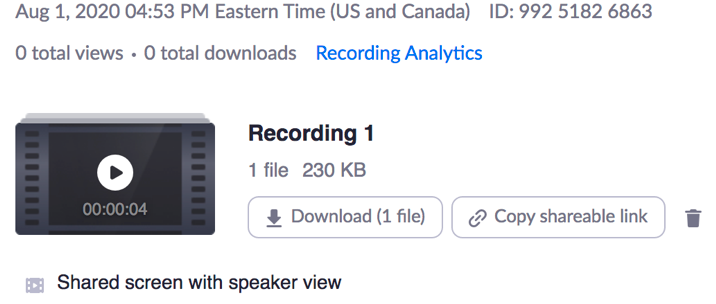
- If you’ve saved it to the cloud, the following image will appear to let you know it’s ready to be downloaded:
- Click on “Download” and specify where you want it to be saved (your Desktop or in a particular file). The file will appear there as an .mp4, ready to be posted in Canvas or emailed to your students.

For more details, see Zoom → Recording.
References & Resources
Boettcher, J. and Conrad, R-M. (2016). Simple rules for feedback in online learning (pp. 239-252). The Online Teaching Survival Guide: Simple and Practical Pedagogical Tips. San Francisco, CA: Jossey-Bass.
Girons, A. and Swinehart, N. (2020). Teaching Languages in Blended Synchronous Learning Classrooms. Georgetown, VA: Georgetown University Press.
Zoom's basic tutorial: [1:35]
How to Record a Meeting in Zoom (Video and Audio): [5.42]
